Update - Replace a record in a database table
This action converts a data structure to a database record and updates the record in a database table.
Triggers
<Record> (non-repetitive trigger [required]): The record to update (a data structure with the record's new fields).
Exits [none required]
<Updated> (non-repetitive exit [not required]): The input data structure, in case the record has been updated in the table.
<Not Found> (non-repetitive exit [not required]): The input data structure, in case the record has not been updated (as it had not existed in the table in the first place).
Notice: The two exits represent two mutually exclusive possibilities: <Updated> is activated only if the record has been updated in the table; <Not Found> is activated only if it has not been updated. You can use the action with just one of the exits (if there is only one case that is interesting) or with both exits. You can also use the action with none of them (if none of the exits exists, you can, but not have to, add a <Done> empty exit, which will be activated in both cases).
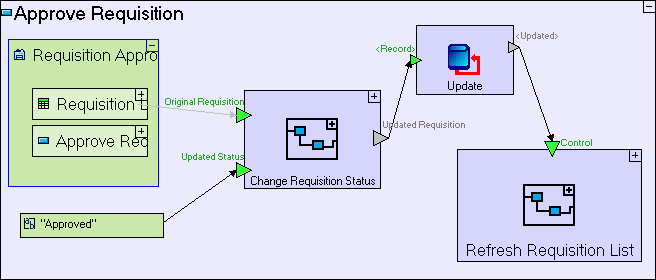
Usage Example "Approve Requisition" (at the end of stage 6 of the tutorial):