Local history
Every time an editable file is saved in the Workbench, the Workbench
updates the local history of that file and logs the changes that have been made.
The local history of a file can then be accessed and a previously saved copy
of the file can be reverted to, as long as the desired state is recent enough
in the save history.
- Create a new file named sampleFile.txt.
- In the editor for sampleFile.txt modify the file by adding the line
"change1" and saving the file.
- Repeat this by entering a new line "change2" and saving it again.
- Add a third line "change3" and save it again.
- Right-click the file in a navigation view (e.g. the Project Explorer) and
select Team > Show Local History.
Note: Repository tooling may override the Team > Show Local History
operation to provide a unified history for a file. The Eclipse CVS client does override this action.
To get the history for
a file in a project that is shared with CVS, you will need to right-click the file and select
Team > Show History. See
Working with CVS History for more details about the
CVS history of a file.
- The History view opens and shows the history for the file.
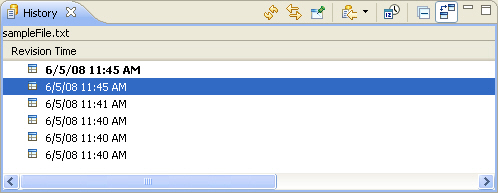
- The top entry in the view represents the current contents of the file.
The next represents the previous contents and so on.
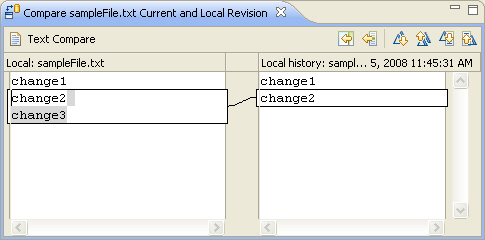
Right-click on the previous entry and select Compare Current with Local
to open a Compare editor that displays the differences between
the Workbench file and the specific copy of the file selected in the local
history.
- Right-click on the previous entry again and select Get Contents.
This replaces the Workbench's copy of
sampleFile.txt with the chosen local history item.
- Observe that the sampleFile.txt editor now contains two lines.